
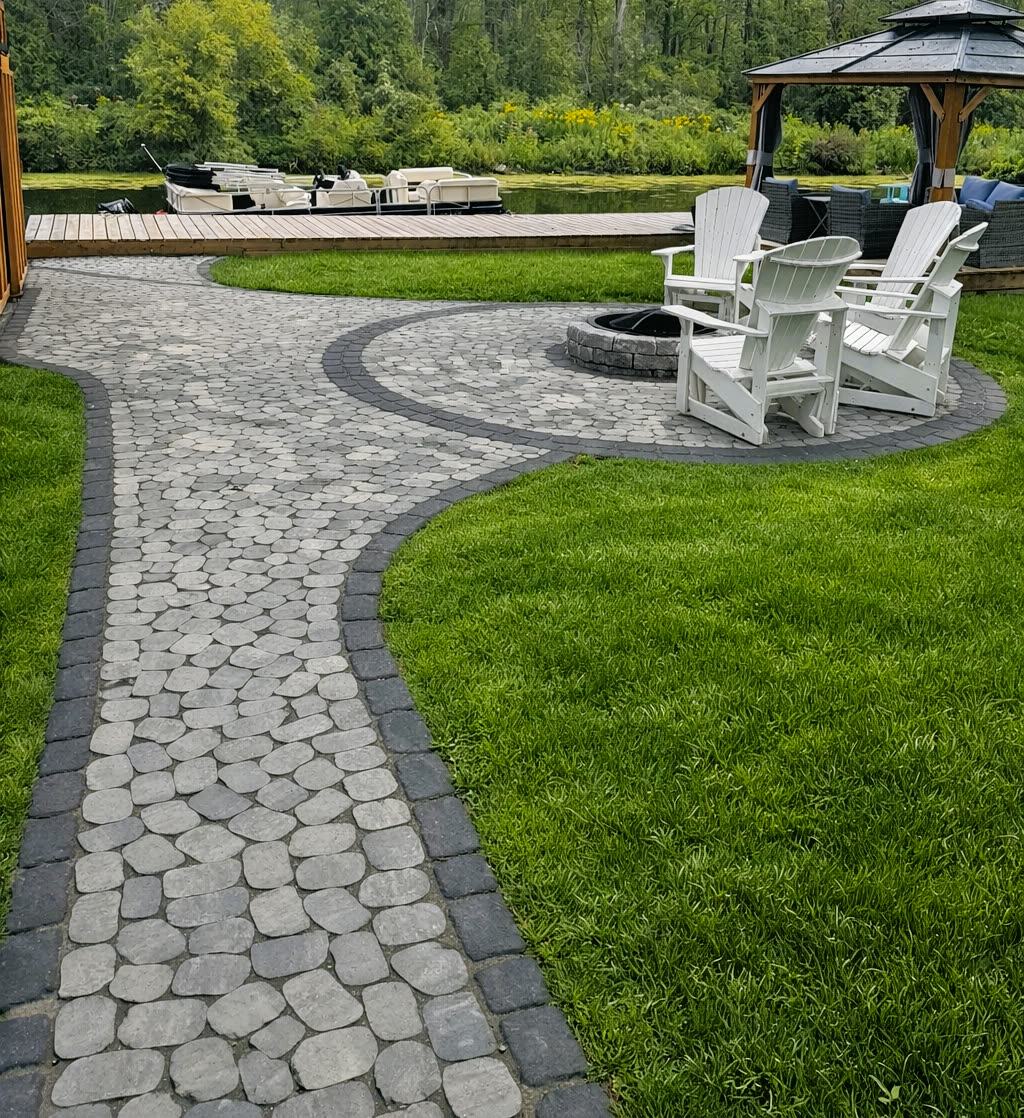
Spring cleanup in Barrie runs from late April through mid-May once overnight lows stay above -2 degrees C. The 12 tasks that matter most — paver joint inspection, drainage clearance, retaining wall assessment, deck fastener check, lawn aeration, and bed edging reset — take roughly 3 to 6 hours across two weekends for a typical Simcoe County property. Skipping the paver joint check is the most expensive omission: a washed-out polymeric sand joint left through summer invites weed root intrusion that costs $800 to $2,000 to fix properly.
By late April, most Barrie properties look rough: salt stains on the driveway, frost heave along walkway edges, mulch beds scattered by winter winds, and patios that have developed a noticeable lean on one corner. That is not a cosmetic problem — it is the predictable result of a Simcoe County winter. Barrie's clay-heavy soil expands when it freezes and contracts when it thaws, cycling roughly 60 to 85 times between November and March. Every one of those cycles puts lateral stress on your interlocking base, pushes settlement upward through your joint sand, and works on the footing of any retaining wall or set of steps on your property.
The point of spring cleanup is not to make the yard look presentable before the neighbours notice. It is to catch the damage that will cost four times as much to fix if you leave it another season. The 12 tasks below are ordered by consequence — the ones at the top, if ignored, lead to structural repairs in the $3,000 to $15,000 range. The ones toward the bottom address recovery and longevity. Use our project cost estimator to budget any repairs you find along the way.
We have completed spring assessments and repairs on hundreds of properties across Barrie, Innisfil, and Oro-Medonte since we opened in 2020. The following is what we actually look for when a customer calls in May saying their patio shifted, their retaining wall is leaning, or their drainage is backing up toward the foundation. It is not a checklist scraped from a generic gardening source — every task here maps to a real repair category we encounter in Simcoe County each spring.
Why Barrie's Freeze-Thaw Season Is Harder on Hardscape Than Most Ontario Cities
Barrie sits at the northern edge of the Greater Golden Horseshoe, where Lake Simcoe's proximity creates a microclimate that produces more freeze-thaw cycles per winter than cities south of the Highway 400 corridor. Environment Canada weather station data for Barrie consistently shows temperatures crossing the 0°C threshold between 60 and 85 times per season — compared to 35 to 50 cycles in the Toronto region. That difference matters significantly for any hard surface on your property.
When water penetrates a paver joint, a crack in mortar, or a gap in a deck board, it expands by approximately 9% as it freezes. That expansion is directional — it finds the path of least resistance, which is usually upward or outward. Over 70 freeze-thaw cycles, a paver that started with 2 mm of settlement can heave 12 mm or more out of plane. A retaining wall with poor drainage behind it can rotate 25 mm at the cap level, which is the threshold at which structural review becomes necessary under Ontario Building Code guidance.
Barrie's clay content amplifies the effect. Unlike the sandier soils common in Collingwood or Wasaga Beach, clay retains water rather than draining it. That retained moisture is what fuels the heave. This is why we specify 12 to 16 inches of compacted clear stone — not granular A — as a base on every interlocking job we do. Clear stone drains; granular A holds fines and moisture. The difference in performance after five winters is measurable: a properly drained clear stone base typically shows less than 5 mm of differential settlement, while a granular A base under similar conditions can show 20 to 40 mm of movement.
All of this is context for the inspection tasks below. When you walk your property this spring, you are not just tidying up the yard — you are reading the physical record of how the soil and water on your property behaved over the past five months.
Paver and Interlocking Surface Inspection: Tasks 1 to 3
Task 1 — Walk every interlocking surface and look for differential settlement. Use a 1.2 m straight-edge — a long level works — and lay it across the surface in both directions. Any deviation greater than 10 mm over 1 m is worth noting; anything over 20 mm in a pedestrian or driveway area is a repair priority. Slight crowning is normal and often self-corrects over one dry summer. A dip or valley, especially near a downspout discharge or a tree root zone, is more concerning because water will pool there and accelerate base erosion.
Task 2 — Inspect joint sand depth. After a Barrie winter, polymeric sand washes out at surface edges and in any low spot where water collected. Scrape a joint with a stick or flat-head screwdriver: the sand should be within 5 to 10 mm of the paver surface. If you can probe 20 mm or more of open joint, the gap is exposed to weed germination and further erosion. Re-sanding with a quality product — we use Techniseal HP Polymeric Sand on commercial and residential projects alike — costs roughly $150 to $400 for an average-sized patio depending on the extent of depletion. Left until fall, the same repair often costs twice as much because weed roots have established in the open joints and must be removed first.
Task 3 — Check perimeter edge restraints. The plastic or aluminium restraint that holds the outer row of pavers in place can be lifted by frost heave or displaced by lawn maintenance equipment over the winter months. Walk the entire perimeter and look for sections that have popped up or tilted outward. A displaced edge restraint is the most common cause of the slow spreading you see in older patios where the outer rows migrate away from the centre over several seasons. Resetting it is a straightforward 30-minute repair; ignoring it leads to row-by-row migration that eventually requires a full border relay. Our interlocking repair services cover all three of these inspection findings if the scope exceeds a comfortable DIY fix.
Drainage and Grading Assessment: Tasks 4 to 6
Task 4 — Clear all catch basins and channel drains. Winter debris — leaves, sand, salt residue, and grit — compacts in catch basins over five months of cold weather. In Barrie, blocked drains are among the most common causes of premature paver base failure we see on spring service calls. Pour a full bucket of water into each basin and time the drain: it should clear in under 30 seconds. If it takes longer, manually clear the accumulated debris and flush again. A basin that will not clear with manual cleaning needs the downstream pipe inspected for root intrusion or frost-caused pipe settlement.
Task 5 — Verify positive grading away from the foundation. Ontario Building Code requires a minimum 2% slope — that is 20 mm of drop per metre — away from the foundation for the first 1.8 m. In clay soil areas, which includes most of central and south Barrie, settled soil near the house gradually compresses every year and can reverse that grade to neutral or negative. Use a 1.2 m level and check the grade at three or four locations around the foundation perimeter. If any section has gone flat or slopes toward the house, water is now pooling against your foundation wall during rain and snowmelt. Correction typically involves regrading with topsoil and sometimes installing a swale to redirect the flow. For Barrie properties with clay-dominant soil, this grading check should be treated as an annual task, not a one-time fix.
Task 6 — Inspect downspout extensions and splash pads. Downspout extensions should discharge at least 1.8 m from the foundation and terminate on a splash pad or pop-up emitter — not against an interlocking border or directly onto lawn that slopes toward the house. Over winter, extensions get kicked loose by snowblowers, buried by frost heave in the lawn, or blocked with debris. A disconnected downspout releasing 50 to 100 litres of water during a single heavy rainfall event against a paver edge will undo a properly constructed base within three to five seasons.
Retaining Walls and Steps: Tasks 7 to 9
Task 7 — Check every retaining wall for rotation, cracking, and cap displacement. Stand at the end of the wall and look down its full length — this sight-line approach reveals bowing that is impossible to see when standing directly in front of the wall. Any visible bow exceeding 25 mm over the wall's length is a structural concern that warrants professional assessment, particularly for walls over 900 mm in height. Walls over 900 mm fall under Ontario Building Code permit requirements in most Simcoe County municipalities, which means a registered engineer may need to sign off on repairs, not just the contractor. For walls under 900 mm, minor cap displacement is common after a hard winter and is correctable by resetting the affected units in fresh cap adhesive.
Task 8 — Test drainage behind the wall. Most residential retaining walls have a gravel backfill column and a perforated drain tile at the base. After winter, flush water slowly along the back of the wall and observe whether it exits cleanly from the drainage outlet at the base. If water pools behind the wall and takes more than two minutes to begin appearing at the outlet, the drain tile may be blocked or have settled out of grade. Hydrostatic pressure building behind a wall is the primary driver of structural failure — not the weight of the retained soil. A Permacon or Unilock block wall with proper drainage behind it will outlast one with blocked drainage by 20 to 30 years under Barrie's freeze-thaw conditions.
Task 9 — Walk every set of steps for rocking and joint integrity. Grip the top rail of any handrail and apply lateral force — there should be essentially no movement. Then rock each step tread individually by pressing down on opposing corners: zero movement is correct, and even 3 to 5 mm of rocking indicates the base beneath that tread has settled unevenly and the unit is no longer fully supported. Step repairs completed in early May, before the outdoor entertaining season begins, are straightforward. Left until a step fails under load, the same issue becomes a liability matter. We back every set of steps and walls we install with a five-year structural warranty.
Composite Deck and Structure Inspection: Task 10
Task 10 — Inspect deck framing, fasteners, and ledger connection. For TimberTech composite decking — which we install on the majority of our deck builds — the boards themselves require minimal spring attention. They do not rot, check, or splinter the way pressure-treated wood does. What does require annual assessment is the substructure underneath. Probe the outer rim joist and ledger board with a screwdriver: if the blade sinks more than 5 mm with moderate hand pressure, wood rot is beginning to compromise the frame. The ledger board connection to the house is the single most structurally critical point on any deck — a corroded or improperly fastened ledger can cause sudden collapse under an occupied load, which is why it is the first thing any experienced inspector checks.
Walk the perimeter and examine every visible fastener at the ledger connection and at post bases. Galvanised hardware corrodes faster in the salt-saturated air that accumulates on decks adjacent to driveways treated with road salt through winter. Post bases should be elevated at least 150 mm above finished grade — bases sitting at or below grade accelerate rot in the post even with pressure-treated lumber. If the deck is more than 10 years old and used untreated wood components, spring is the time to arrange a proper structural assessment.
For composite deck boards specifically: check for any fastener backs that have popped above the surface, which is a common result of freeze-thaw movement. Reset them with a rubber mallet or plastic putty knife — do not use metal tools that can scratch the composite surface. Look for any board ends that have lifted at the rim joist; this usually indicates a hidden clip or fastener has failed. A single lifted board left through a wet spring allows water to pool and accelerates corrosion on the stainless or composite clips below. TimberTech warranties cover manufacturing defects but not failures resulting from improper installation or deferred maintenance — so document anything you find.
Lawn and Garden Recovery: Tasks 11 and 12
Task 11 — Aerate and overseed bare or compacted lawn areas. Barrie's clay soil compacts significantly under snow load and foot traffic over five months of winter. Compaction reduces oxygen penetration and slows spring root development. Core aeration — using a mechanical aerator that extracts plugs 50 to 75 mm deep — should be done when soil temperature consistently reaches approximately 10°C, which in Barrie typically falls between May 1 and May 20 depending on the season. Immediately after aeration, apply a top-dress of compost mixed with sharp sand at 10 to 15 mm depth, rake it into the aeration holes, then overseed with a Kentucky bluegrass blend rated for clay-heavy soils. Germination takes 10 to 21 days under normal Barrie spring conditions. Water twice daily for the first two weeks — 5 to 10 minutes per zone — to keep the seed contact zone moist without saturating clay that drains slowly.
Task 12 — Reset mulch beds and redefine lawn edges. Winter degrades mulch beds in two ways: organic decomposition reduces depth by 20 to 30% per season, and frost heave disturbs the clean edge between bed and lawn. In spring, use a half-moon edger to recut the bed edge before applying new mulch — cutting first gives you a clean physical reference line rather than guessing where the old edge was. Apply mulch at 50 to 75 mm depth; any deeper and you risk burying lower perennial crowns and creating conditions for crown rot. We recommend double-ground cedar or hardwood bark for Barrie properties — it suppresses weeds for 8 to 12 months compared to 4 to 6 months for shredded straw, and it breaks down into organic matter that gradually improves clay soil structure.
Keep all mulch at least 150 mm away from building foundations and 50 mm from tree trunks — moisture held directly against a trunk or siding accelerates rot and provides habitat for insects. If your lawn shows areas larger than 1 square metre of bare ground or sheet-runoff compaction, consider whether sodding is more practical than overseeding. Sod establishes in 2 to 3 weeks; seed takes 6 to 8 weeks to reach mowing height. The cost difference is typically $1.50 to $2.50 per square metre more for sod, which most clients find worthwhile on a high-visibility front lawn.
Spring cleanup priority matrix for Barrie properties — ordered by consequence
| Task | Priority | Timing | DIY or Pro | Repair Cost if Skipped |
|---|---|---|---|---|
| Paver settlement inspection (Task 1) | High | Early May | DIY inspect / Pro fix | $1,500–$8,000 relay |
| Joint sand inspection (Task 2) | High | May | DIY re-sand | $150–$400, rises to $800+ if left |
| Edge restraint check (Task 3) | Medium | May | DIY | Full border relay $1,000+ |
| Catch basin clearance (Task 4) | High | Late April | DIY | $3,000–$10,000 base failure |
| Foundation grading check (Task 5) | High | Late April | DIY assess / Pro fix | $5,000–$20,000 waterproofing |
| Downspout extension check (Task 6) | Medium | Late April | DIY | Premature base erosion |
| Retaining wall inspection (Task 7) | High | Early May | DIY inspect / Pro fix | $3,000–$15,000 rebuild |
| Deck ledger and fastener check (Task 10) | Medium-High | May | DIY or structural inspection | $800–$5,000 frame repair |
| Lawn aeration and overseeding (Task 11) | Medium | May 1–20 | DIY or Pro | Thin turf, compaction worsens |
| Mulch reset and bed edging (Task 12) | Low | Mid-May | DIY | Weed pressure, aesthetics |
Frequently Asked Questions
When should I start spring cleanup in Barrie?
Start the structural inspection tasks — paver settlement, drainage, retaining wall — in late April once overnight lows are consistently above -2°C and the ground has thawed to at least 50 mm depth. Starting while the ground is still frozen gives you inaccurate settlement readings because frost heave is still in progress. For most Barrie properties, the first two weeks of May are the most productive window for the full 12-task checklist.
How do I know if my interlocking patio needs to be relaid or just spot-repaired?
If differential settlement is under 20 mm and limited to one or two discrete spots, a targeted repair — resetting individual pavers, adding base material, and re-sanding the affected area — is usually sufficient and costs $500 to $2,000 depending on scope. If the settlement is widespread (more than 20% of the surface affected), or if the base has been saturated through multiple seasons, a full relay of the affected section is more economical than repeated spot repairs.
Does polymeric sand need to be replaced every spring in Ontario?
Not every spring. A quality polymeric sand installation — applied correctly with a plate compactor and properly activated with water — should hold for 5 to 8 years in Barrie conditions before requiring a full re-application. What does need attention each spring is spot touch-up at joints where the sand has washed out or where settlement has opened gaps wider than 10 mm. The threshold for full replacement is when more than 30% of joints are visibly depleted below 10 mm from the surface.
Can I use road salt on my interlocking pavers in Barrie?
We recommend avoiding chloride-based salts — sodium chloride, calcium chloride — on interlocking paver surfaces. They do not cause spalling the way they damage poured concrete, but they accelerate polymeric sand degradation and can stain lighter-coloured Permacon and Unilock units over several seasons. Sand-and-grit is the safer traction alternative for winter. If you used salt over the past winter, flush the surface thoroughly with fresh water in early spring before it dries and concentrates at the joint level.
How much does a professional spring landscape assessment cost in Barrie?
A professional spring site assessment in Barrie typically costs $150 to $350 for a 1 to 2 hour walkthrough, depending on property size and scope. Most contractors, ourselves included, credit the assessment fee toward any repair work we perform. For a standard patio and drainage review on a property with 500 to 800 square feet of interlocking surface, expect 60 to 90 minutes of inspection and a written summary with repair priorities and rough costs.
What soil temperature do I need for overseeding a lawn in Barrie?
Kentucky bluegrass and fescue blends — the most common seed types for Barrie's clay soils — require consistent soil temperatures of at least 10°C for reliable germination. In most Barrie springs, that threshold is reached between May 1 and May 20. Seeding before soil hits 10°C is not wasted, but germination will be patchy and slow. Aerate first, then seed immediately after — the aeration channels improve seed-to-soil contact and speed germination by 3 to 5 days in clay conditions.
Is spring or fall the better time for retaining wall repairs in Barrie?
Spring is preferable for most retaining wall repairs. You catch freeze-thaw damage before it compounds through a wet spring and summer, and contractor schedules are generally more available in May than in the September-October rush. The exception is major reconstructions involving deep excavation — those are best scheduled for late summer when soil is drier, excavation conditions are more stable, and the risk of a sudden rainstorm undermining an open excavation is lower.

Yorkis Estevez founded Golden Maple Landscaping in 2020 and has since installed hundreds of interlocking paver driveways, patios, retaining walls, and composite decks across Simcoe County. The company is WSIB certified, carries $5M in liability coverage, and holds a 5.0 Google rating from clients across Barrie, Innisfil, Oro-Medonte, and Springwater.
If your spring walkthrough turned up settlement, drainage issues, or a retaining wall that does not look quite right, we can help. We serve Barrie, Innisfil, Oro-Medonte, Springwater, Orillia, Wasaga Beach, Midland, and Collingwood, and we provide written assessments with fixed-price repair quotes. Contact Golden Maple Landscaping to book your spring site visit — the earlier in the season you book, the better the scheduling options.