
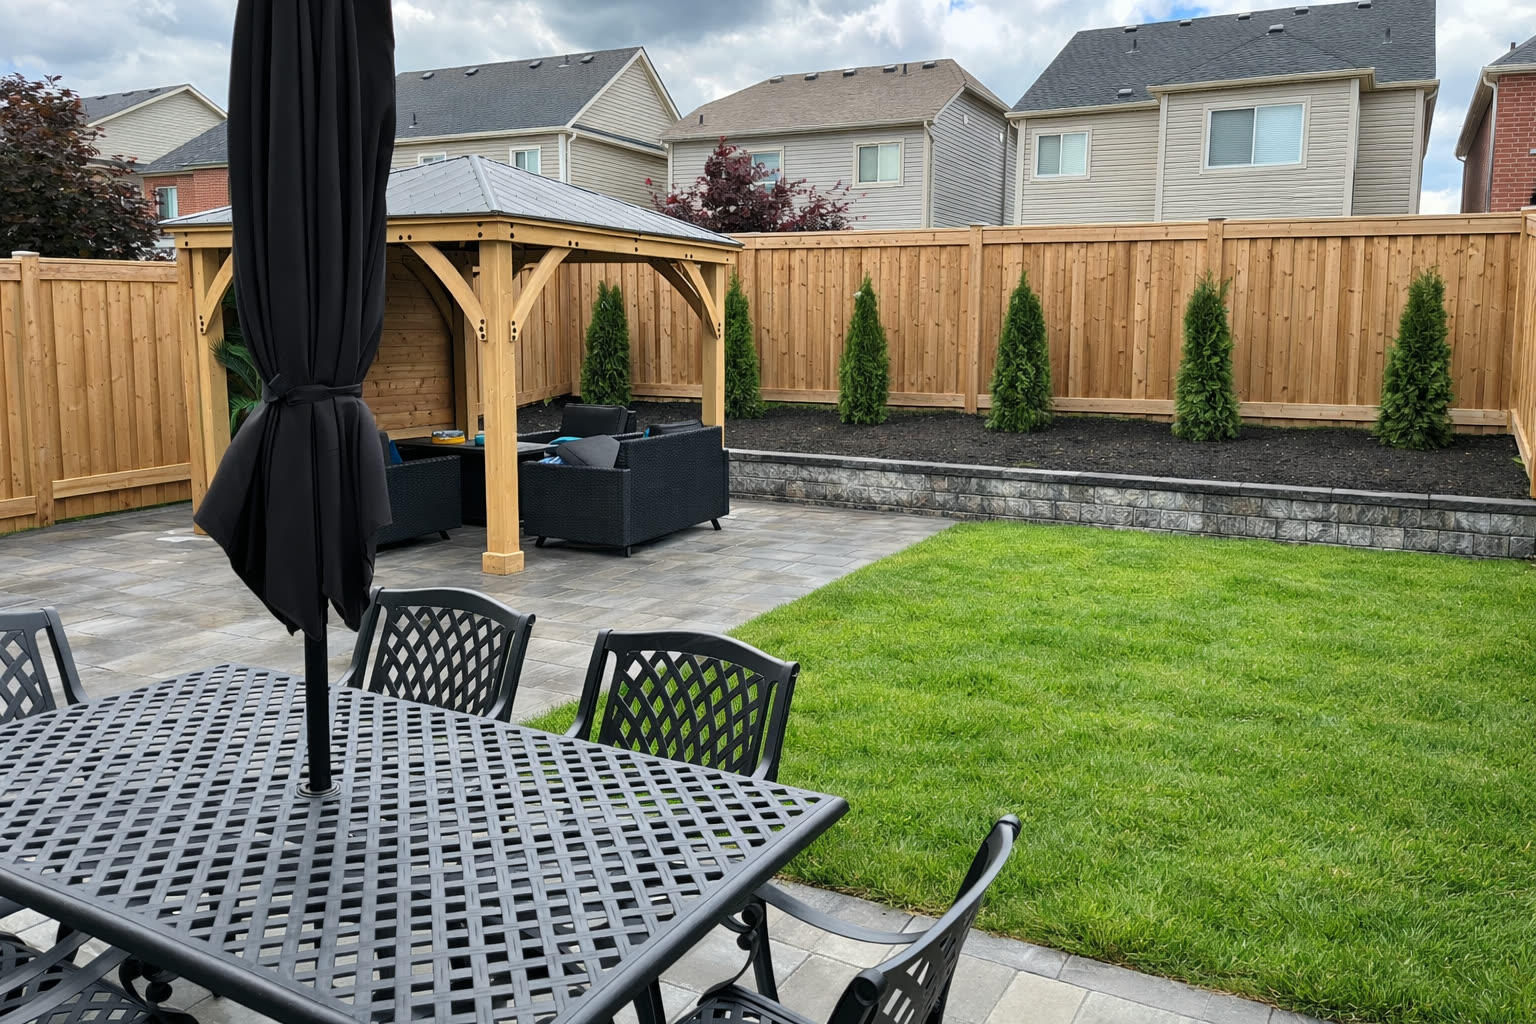
The most common landscape lighting mistake in Simcoe County is colour temperature — choosing fixtures that run at 5,000–6,500K (cold daylight white) instead of the 2,700–3,000K warm-white range that makes stone, brick, and plant material look appealing at night. After that: over-lighting a flat front yard with 30 path lights where 10 would do, and burying low-voltage cable less than 15 centimetres deep where Ontario freeze-thaw will push it out of the ground every spring.
The way outdoor lighting is typically marketed — buy a 12-pack of solar stake lights from a big-box store, push them into the ground every 45 centimetres, call it done — produces exactly the look most properties are trying to avoid: the 1990s motel forecourt. We see this on properties across Barrie, Innisfil, and the townships along Highway 400 when clients bring us in after a dissatisfying first attempt. The individual fixtures are not always bad. The approach usually is.
Landscape lighting is a design medium with a set of rules that are less intuitive than they look. Colour temperature, beam angle, mounting height, circuit load, cable depth — each of these affects whether the result reads as a thoughtfully lit property or an afterthought. In Ontario specifically, there is a layer of engineering that standard kits ignore: freeze-thaw heave, salt from ice-melt products, and the reality that cable buried at 5 to 8 centimetres in Barrie clay works its way to the surface within 2 to 3 winters.
This guide covers the six mistakes we correct most often on Simcoe County properties — and what the right approach looks like in each case. For the broader principles behind a well-designed system, see our landscape lighting guide for Barrie. If you are ready to discuss a specific property, start with our online cost estimator for a rough range before we visit.
Mistake 1: Wrong Colour Temperature Makes Everything Look Institutional
Colour temperature is measured in Kelvins and describes whether a light source reads as warm (amber) or cool (blue-white). Most big-box landscape kits ship with LEDs running at 5,000–6,500K — a cool daylight range that makes sense in a warehouse and looks completely wrong on a front walkway. At 5,000K, your stone pavers appear grey-white, your plant material loses depth, and the whole effect reads as a parking lot under artificial daylight.
The right range for residential landscape lighting is 2,700–3,000K. At 2,700K you get a warm amber cast that is flattering on almost every exterior material — Permacon and Unilock pavers, natural stone, cedar, brick siding. At 3,000K the result is slightly crisper: still warm, but better suited to contemporary architecture or light-coloured stone finishes. We default to 2,700K on path lights, uplights, and deck lights on almost every Simcoe County installation. The exception is accent lighting on white or very pale surfaces, where 3,000K avoids a slightly orange cast.
The second colour-temperature error is mixing sources. A yard where path lights run at 2,700K, uplights are at 3,000K, and a leftover halogen near the garage throws 2,400K light looks incoherent. The eye perceives multiple temperatures as a composition problem even if the viewer cannot name the specific cause. Commit to a single temperature across the entire system — ideally sourced from one product line so the phosphor binning is consistent lot to lot. In-Lite fixtures, which we install across Barrie and Innisfil projects, are factory-set at 2,700K and use the same phosphor formulation across the entire line, which eliminates the colour-drift issue that comes from mixing brands.
Before specifying any fixture, verify the colour temperature in the product datasheet — not the box label, which sometimes rounds or uses marketing language. A fixture listed as warm white could be anywhere from 2,700K to 3,500K depending on the manufacturer. The datasheet lists the actual Kelvin value.
Mistake 2: Over-Lighting a Front Yard Until It Looks Like a Runway
More lights does not mean better lighting — it usually means worse lighting, and it is the second most common error we see on properties brought to us for a retrofit. A typical front yard in a Barrie subdivision has 9 to 12 metres of front walkway with a planting bed on each side. Clients who go the DIY route often install a path light every 60 to 90 centimetres — 12 to 16 fixtures covering a strip that 5 or 6 well-placed fixtures would handle more effectively. The result is a lit runway that draws the eye down the path rather than across the full property composition, and at $40–$80 per fixture, it is significantly more expensive than necessary.
The practical spacing for path lighting is 2 to 3 metres, staggered rather than inline. Staggering means placing lights on alternating sides of the path: one on the left at the top, one on the right 2.5 metres down, one on the left 2.5 metres after that. The overlapping light pools read as continuous coverage without the formal symmetry that makes a walkway look like an airstrip. At 2.5-metre spacing on a 10-metre walkway, that is 4 to 5 fixtures — not 12 to 16.
The same principle applies to uplighting. A single 5W or 8W In-Lite spot aimed at a mature tree or architectural detail delivers more visual impact than three cheaper fixtures scattered around the base of the same tree. Uplighting works through contrast: the lit object reads clearly because the surrounding area is darker. Flooding the entire front yard with brightness flattens that contrast and produces an overexposed look that the eye reads as cheap even without being able to articulate why.
If you are unsure how many fixtures a property actually needs, our landscape design team in Barrie can walk through a scaled lighting plan as part of the broader outdoor design process. That conversation prevents both the under-lit and the over-lit outcome that drives retrofit calls 18 months after installation.
Mistake 3: All Fixtures at Ground Level Produces a Flat, One-Dimensional Result
A lighting scheme built entirely from path stakes and low-level ground lights produces a yard that looks acceptable from a moving car and flat from every other angle. Ground-level sources illuminate the ground surface and the lower 30–60 centimetres of plant material. They do not illuminate the volume of the landscape — the height and mass that give a property its character at night.
Effective residential lighting uses at least three levels: ground-level path and accent lighting, mid-level (60–120 cm) uplighting aimed at shrubs and architectural details, and high-level uplighting aimed at tree canopy or roofline elements. A 60 cm boulder, a mature cedar hedge, or a fieldstone retaining wall reads completely differently under a 15W uplight at grade versus a 15W wall-wash mounted 90 centimetres up on the face of the wall. The wall-wash shows texture and depth. The grade uplight shows only the bottom edge.
Down-lighting from a height of 3 to 4 metres — from a soffit, a mounted post fixture, or a tree-mounted spot — produces what designers call a moon-lighting effect: a soft, broad pool of light that mimics the shadow pattern of a full moon and works well for seating areas, decks, and spaces where people gather after dark. It is also significantly more glare-free than ground-level fixtures aimed upward at eye height, which is a common complaint from neighbours on corner lots where a misaimed uplight shines directly into the road.
When we lay out a lighting plan for a Barrie or Innisfil property, the first decision is always the high anchors — the trees, rooflines, or architectural peaks that will be the feature elements — and then we work downward to fill in the path and accent lighting. Building the plan from the bottom up almost always results in too many ground lights and not enough vertical interest.
Mistake 4: Shallow Cable Burial Fails Every Ontario Winter
Low-voltage landscape lighting runs on 12V systems — safer and more accessible than line-voltage (120V) installation, but still dependent on buried cable that has to survive Ontario winters. The standard direct-burial depth specified by most manufacturers and referenced by the Ontario Electrical Safety Code for low-voltage outdoor cable is a minimum of 15 centimetres, with 30 centimetres preferred in areas subject to maintenance work or soil disturbance. Most DIY installs we evaluate are running cable at 5 to 8 centimetres — barely below the surface, and squarely in the zone where freeze-thaw heave moves it every winter.
Barrie and Simcoe County experience between 60 and 85 freeze-thaw cycles per year — each cycle pushes soil upward as water expands into ice, then settles unevenly as it thaws. Over 2 to 3 winters, cable buried at 5 to 8 centimetres migrates to the surface, where it becomes a tripping hazard, a mowing casualty, and in some cases a source of connection failures as the jacket work-hardens and cracks. Cable at 30 centimetres stays put — we have pulled up systems on properties where the original cable was installed 10 years earlier and the conductor and jacket are still in clean condition.
For runs crossing under hardscape — driveways, walkways, patio slabs — the correct method is to sleeve the low-voltage cable through a 25 mm or 32 mm conduit before the hardscape is poured or installed. This allows the cable to be replaced or supplemented without breaking up the surface. We install conduit sleeves under every paved crossing on lit properties as a standard practice. A retrofit to re-run a failed cable under an interlocking driveway costs $600–$1,200 in labour and materials; the conduit sleeve installed correctly the first time costs around $30.
If your current system has cables you can see or feel just below the mulch surface, it is worth scheduling a proper burial and conduit installation before the cables cause a bigger problem. Reach out through our contact page and we can assess what is in place.
Mistake 5: Aiming Fixtures at What Is Convenient Rather Than What Reads Well
Fixture placement is where most DIY lighting plans fail quietly — not with dramatic errors, but with a series of small misalignments that accumulate into a system that looks slightly wrong without a clear diagnosis. The most common form: uplights aimed at smooth stucco or vinyl siding rather than at plant material, stone, or architectural details that have genuine visual interest at night. Smooth, uniform surfaces produce a glowing rectangle at night — there is no texture or relief for the light to model, so the result is a washed-out wall rather than a lit feature.
Stone, brick, rough-cut concrete block, and textured plaster show depth under light because they have surface relief — the high points catch the beam while the recesses shadow. A 5W uplight aimed at a 1.2-metre fieldstone retaining wall from 45 centimetres away at a 30-degree angle produces a wall that looks dimensional and interesting at night. The same fixture aimed straight-on at smooth siding produces a rectangle of light that draws the eye without rewarding it. The material matters as much as the fixture and the wattage.
The second placement error is positioning path lights too far from the path edge. Path lights work by illuminating the walking surface and the immediate border planting on each side. Placing them 45 centimetres or more from the edge of the paver or interlock means the beam misses the walking surface and lights the garden bed instead. Path light heads should be positioned 15 to 30 centimetres from the path edge, with the beam angled slightly down toward the walking surface rather than straight outward.
For a detailed walkthrough of how lighting integrates with hardscape and planting on a Simcoe County property, see our landscape lighting guide. If you are ready to plan a system alongside a full outdoor space design, our design team produces scaled lighting layouts as part of every comprehensive project scope.
Mistake 6: Overloading a Transformer Causes Voltage Drop No One Diagnoses Correctly
The most common symptom homeowners bring to us isn't a failed fixture — it's a system where the lights near the transformer look normal and the fixtures at the far end of the run look dim, or run visibly warmer/cooler than the rest. Almost every time, the cause is voltage drop from an overloaded or undersized transformer, not a bad bulb.
Every low-voltage run loses a small amount of voltage over distance, and the loss compounds with total fixture wattage on the circuit. A 150-watt transformer covers a typical front yard of 8 to 12 fixtures with room to spare — each In-Lite path light draws 3 to 8 watts, uplights draw 5 to 15 watts. Push more than roughly 80% of a transformer's rated capacity onto one circuit, or run one long cable run to every fixture on the property instead of splitting zones, and the fixtures furthest from the transformer are the first to dim and flicker.
The fix isn't a bigger single transformer — it's proper zoning. Multi-zone (multi-tap) transformers let you run shorter, lower-loss circuits to each area of the property instead of one long daisy chain, which is standard practice on any Simcoe County system with more than about a dozen fixtures. If your existing system has fixtures that dim toward the back of the yard, that's a sizing and zoning problem to solve at the transformer, not a reason to keep adding fixtures.
Budget solar/DIY kit vs professional 12V low-voltage system for a Barrie front yard
| Factor | Big-Box Solar / DIY Kit | Professional 12V Low-Voltage |
|---|---|---|
| Colour temperature | Fixed, often 5,000–6,500K | Selectable; 2,700K standard |
| Consistent brightness | Varies with sun exposure and battery age | Consistent — transformer-regulated |
| Cable burial depth | Typically 5–8 cm (DIY) | 30 cm minimum; conduit under hardscape |
| Fixture lifespan | 2–5 years (plastic housings, sealed batteries) | 10–15+ years (brass, aluminium, or stainless) |
| Ontario freeze-thaw resilience | Low — heave moves stakes and cables | High — properly buried and sleeved |
| System expandability | Limited — each fixture independent | Transformer-based; add circuits as needed |
| Typical cost for 10 fixtures | $200–$500 (DIY installed) | $1,800–$3,500 professionally installed |
Frequently Asked Questions
What colour temperature is best for landscape lighting in Ontario?
2,700K is the standard for residential landscape lighting in Simcoe County — it produces a warm amber-white light that flatters stone, pavers, wood, and plant material at night. The 3,000K range works well for contemporary architecture or pale stone finishes. Avoid 5,000K or higher, which reads as cold and institutional and is common in budget solar kits. Commit to a single temperature across the entire system to avoid the incoherent look that comes from mixing colour sources.
How deep should landscape lighting cable be buried in Ontario?
At minimum 15 centimetres, with 30 centimetres preferred in areas subject to freeze-thaw heave. Barrie and Simcoe County experience 60 to 85 freeze-thaw cycles per year, which moves cable buried at 5 to 8 centimetres to the surface within 2 to 3 winters. Cable crossing under any hardscape surface — driveways, walkways, patio slabs — should be run through a 25 or 32 mm conduit sleeve so it can be replaced without breaking up the pavement.
How far apart should landscape path lights be spaced?
2 to 3 metres, staggered on alternating sides of the path, is the right spacing for most residential front walkways. On a typical 10-metre Barrie front walkway, that is 4 to 5 fixtures — not the 12 to 16 that result from the common 60 to 90 centimetre inline spacing. Staggering the fixtures produces overlapping light pools that read as continuous coverage without the runway symmetry of an inline layout.
Does landscape lighting installation require a permit in Simcoe County?
Low-voltage (12V) landscape lighting connected to a plug-in transformer does not require a permit for the low-voltage cable runs. However, hardwired connections to a 120V outdoor circuit — for the transformer itself or for any line-voltage fixtures — require a permit and inspection in Simcoe County municipalities including Barrie, Innisfil, and Oro-Medonte. If you are unsure whether your planned installation triggers a permit, we can clarify this as part of the design conversation.
How many watts does a residential landscape lighting system need?
For a typical front yard with 8 to 12 fixtures, a 150-watt transformer covers the load with room to expand. Each In-Lite path light draws 3 to 8 watts; uplights draw 5 to 15 watts. The total fixture wattage on any transformer circuit should not exceed 80% of the transformer capacity — this prevents voltage drop at the far end of the cable run, which causes the most distant fixtures to dim inconsistently. Multi-zone transformers solve this on larger properties.
What is the difference between uplighting and downlighting for outdoor use?
Uplighting positions a fixture at or near grade and aims the beam upward at a tree, shrub, wall, or architectural feature — creating drama and perceived height. Downlighting mounts a fixture at elevation (soffit, tree branch, or post top) and casts light downward in a broad pool — better for seating areas, decks, and gathering spaces because it is glare-free at eye level. Most well-designed Simcoe County systems use both: uplighting for features, downlighting for functional zones.
What should I look for in a landscape lighting contractor in Barrie?
Look for a contractor who specifies the colour temperature and wattage of every fixture in writing, designs the system on a scaled site plan before purchasing anything, and demonstrates knowledge of cable burial depths for Ontario winters. A contractor who hands you a 12-pack of solar stakes and calls it a lighting plan is not doing design work. Ask to see photos of completed nighttime installations in similar Simcoe County neighbourhoods before committing.

Yorkis Estevez founded Golden Maple Landscaping in Barrie in 2020. We are WSIB certified, carry $5M in liability coverage, and hold a 5.0 Google rating across Simcoe County. Lighting design is part of every full-scope hardscape project we build — because how a patio or driveway looks at 9 pm matters as much as how it performs at 9 am.
If you are planning a lighting upgrade for a Barrie, Innisfil, or Simcoe County property — or redesigning an outdoor space where lighting is part of the picture — we can produce a scaled lighting plan as part of the full design process. Reach out through our contact page and we will respond within one business day.